General Workflow
Contents
General Workflow
Version control is a systematic approach to record changes made in a file, or set of files, over time. This allows you and your collaborators to track the history, see what changed, and recall specific versions later when needed. A typical procedure for using version control is as follows:
Create files - these may contain text, code or both.
Work on these files, by changing, deleting or adding new content.
Create a snapshot of the file status (also known as version) at this time.
This process of creating a snapshot is described differently in different version control software. For example, Git describes it as “a commit”. Some systems call it “a time-point” or “a checkpoint”; and this is referred to as “saving your work” in other cases such as in Google docs or HackMD.
As you keep saving your work by adding changes, you make more and more snapshots. You can think of these as saving versions of these files while documenting their history. If you need to go back to a previous version of a file because of a mistake, or if you changed your mind about a previous update, you can access the file in your preferred version, or return your entire project to a past state.
An illustration of this is shown below.
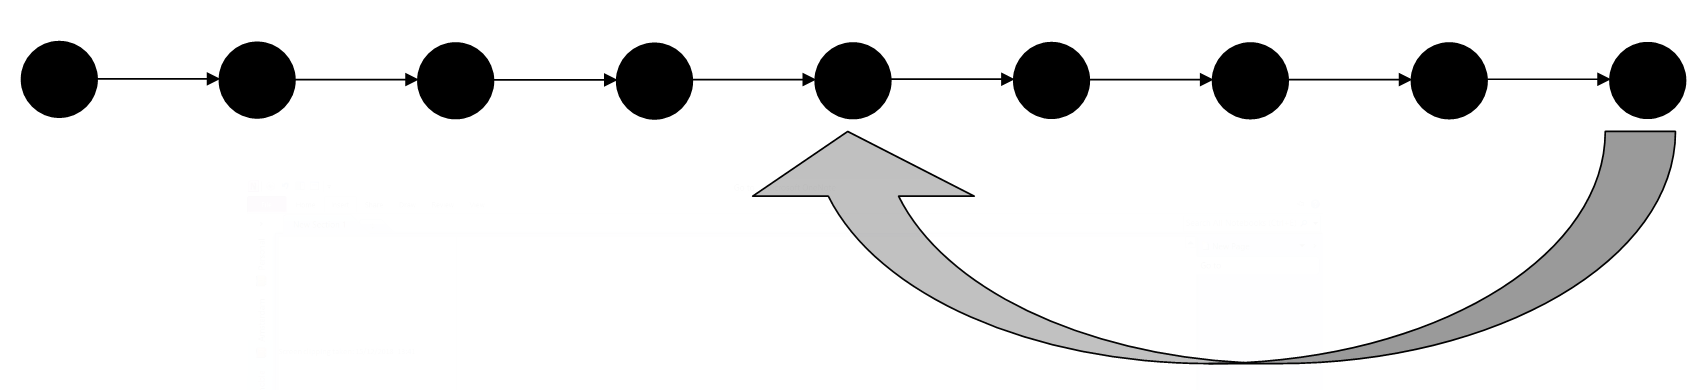
Fig. 16 An illustration of a main branch
In many version control systems, you will be able to add a comment every time you save a new version. These comments should be clear and concise to make it easy to understand what changes were proposed and what updates were made in a version. This ensures that it is easy to find what you are looking for when you need to go back to a past version. Your collaborators will thank you, but so will future versions of yourself.
Non-Linear Development of Your Project with “Branches”
So you have your project and you want to add something new or try something out before reflecting the changes in the main project folder. To add something new, you can continue editing your files and save them with the proposed changes. Suppose you want to try something without reflecting the changes in the central repository. In that case, you can use the “branching” feature of more advanced version control systems such as Git. A branch creates a local copy of the main repository where you can work and try new changes. Any work you do on your branch will not be reflected on your main project (referred to as your main branch) so it remains secure and error-free. At the same time, you can test your ideas and troubleshoot in a local branch.
When you are happy with the new changes, you can introduce them to the main project. The merge feature in Git allows the independent lines of development in a local branch to get integrated into the main branch.

Fig. 17 An illustration of a development and main branch in git.
You can have more than one branch off of your main copy. If one of your branches ends up not working, you can either abandon it or delete it without impacting the main branch of your project.
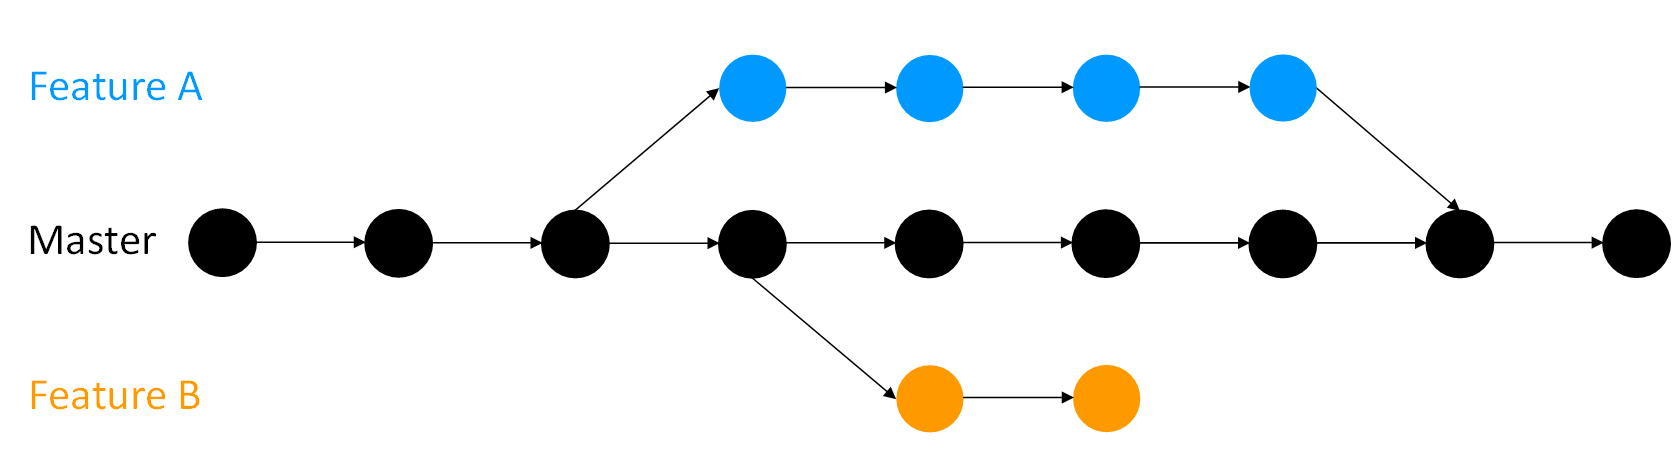
Fig. 18 Two development branches and one main branch in git.
If you want, you can create branches from branches (and branches off of those branches and so on).
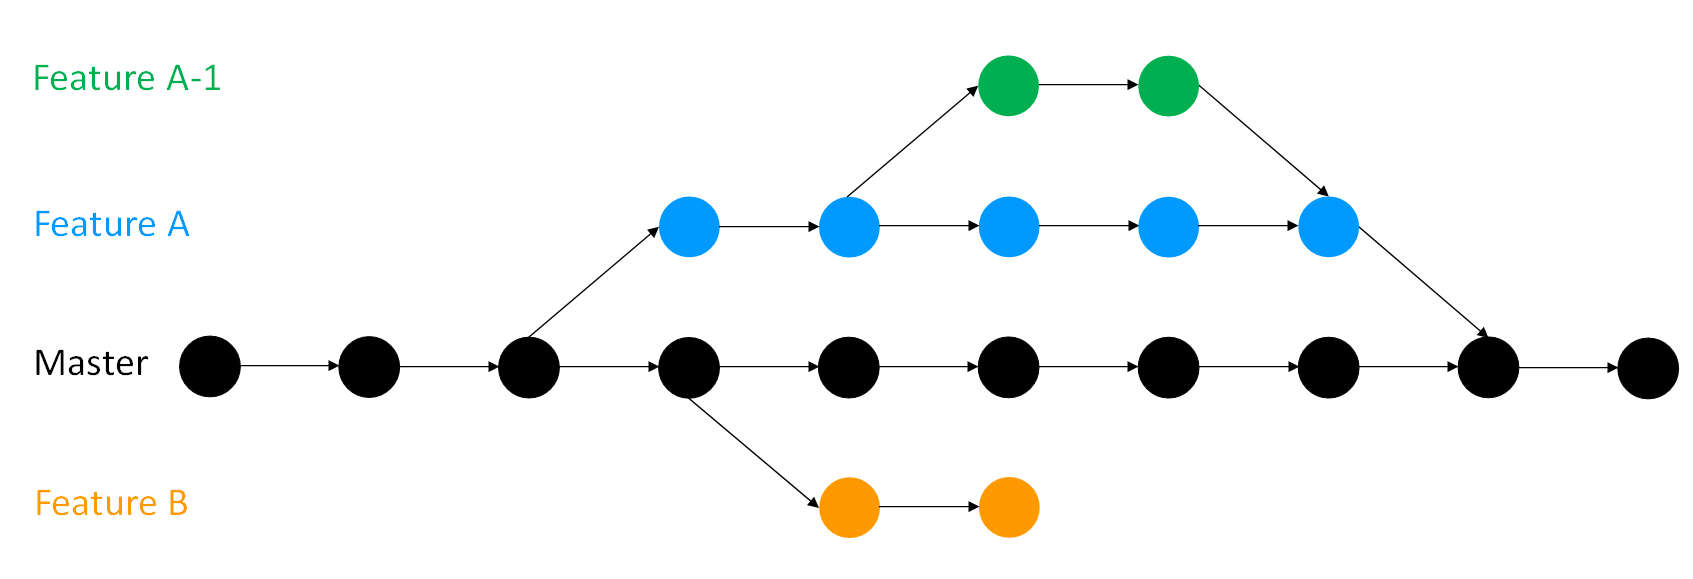
Fig. 19 A development branch in git.
No matter how many branches you have, you can access the past versions you made on any of them. If you are curious to know how to use this feature in practice, you will find more details a few sections ahead.